Living on the Ceiling

Dennis Moore, Dennis Moore, riding through the land
Another snowy winter has passed and a reasonably early start to spring has led to a beautifully cool summer so far in the Upper Peninsula. We spent a good chunk of the winter (when I wasn’t enjoying skiing on my newly-mended foot) sorting fallen ceiling boards, removing the old nails, and putting them back into place.
We had blown cellulose insulation into the ceiling ourselves, which worked out great until we got to the peak of the ceiling, at which point I had stuffed bags of foam insulation scraps into the open space as best as I could, then holding them in place with squares of blue styrofoam. That was good from the standpoint of not wasting the insulation we had trimmed from the walls in order to fit the logs when doing the inner wall, but not the best from an insulation standpoint – there were gaps between the bags and we wanted a tighter seal.
I figured that since I had to re-do the ceiling, and since the peak was now accessible again, it would be a good idea to do the insulation at the top the way we really wanted it.
I used a spray-foam kit from a big box store – it’s similar to the cans of spray foam that you can get, but covers a lot more area, and comes in the form of two tanks whose contents get mixed together at the spray nozzle. It’s messy work, and requires a respirator and sacrificial clothes, as well as protecting the rest of the house with plastic dropcloths, since tiny droplets of foam get everywhere. I hope to not ever have to do that again. After I was done, the bays between the rafters all had at least six inches of foam in them, sealing the ceiling but good.
It's just a top-gap measure
Once again, I crammed bags of insulation scraps into the bays and locked them into place with blueboard:
Mister Blue Ceiling, please tell us why
Finally, I put back the OSB sheathing and re-spackled the joints, and nailed up the final courses of knotty aspen paneling on the ceiling. As you might imagine, I used stout screws in the top course, to prevent any re-occurrences of fallen ceiling syndrome. You can’t tell that there was ever a ceiling drama now, and the house is better insulated for it.
It's like it never happened - except for the extra months of work...
I started writing this post in June, when the lupins were in high bloom, as you can see from the first picture. Our next task: finish cordwooding the walls!

Who loves the sun?

Sorry, coal.

One of our longtime dreams has been to provide our own energy. We’d really like to produce as much as we use, and between heating the place with the masonry heater, using wood we cut ourselves, and our new solar panels, this is likely to be the case.

Early last summer (Summer 2014), we decided we’d better get moving on the solar array. There is currently a 30% federal tax credit (not a deduction, a credit) for many types of solar systems. In addition, there are net metering laws in Michigan that make it worthwhile to tie to the electrical grid – basically, we bank credits during the long, sunny days of summer, and use those credits during the short, gray winter days. As solar becomes more common in the U.S., there also seems to be political backlash against it (apparently not everyone loves the sun!), so it seemed prudent to take advantage of the incentives while they are available.

In the interest of saving time, especially since I was out of commission for months following my foot surgery, we decided to contract out the solar electric work. A local outfit, Blue Terra Energy, has done a number of installs and had a good reputation, so we asked the owner, Dave Camps, to give us a quote. We had done a lot of research and know pretty much what we wanted – two pole-mounted arrays even with the front of the house, between the house and the fenced garden. This area has great sun exposure and  a little too much slope to use as garden. Also, it’s close to the house, particularly the utility room, which makes running the electrical cabling a lot easier.

Dave Camps’ crew started by digging a couple of holes below the frostline, putting massive sonotubes in each, and putting concrete reinforcement bar (rebar) inside the tubes. Next, they lowered the poles (8″ diameter!) into the tubes, staking them so they stayed level:

If I had a rocket launcher...

Next, concrete. Those tubes are 42 inches in diameter. You can imagine how much wind those arrays catch, so this did not seem like overkill.

Our terra is more reddish-brown than blue

Since we designed our house for passive solar gain, there is very little south-facing roof. Because of this, pole-mounted arrays made more sense, even though they are more expensive due to the foundation work. The next step was the racking and the modules (aka panels):

White on white translucent black capes, Back on the rack

Yes, these are silicon. Yes, we are in a valley. No, we are not 'disruptive.'

Finally, the Blue Terra crew installed the inverters and the wiring from the array to the main panel in the house. Inverters convert the DC voltage from the modules into AC that your house wiring uses. For many years,  all of the modules would be connected to a single large inverter, but over the last five or ten years, micro-inverters have become available (and popular). They allow a system to be more flexible and allow for easier growth. They also make it possible to monitor each module individually, making troubleshooting easier. Below, you can see an inverter mounted underneath each module:

C'mon, Mr. Sun, quit hidin!

The system went live September 9, 2014. We tried to size the array to  provide approximately the same amount of electricity in the course of a year as Nerdwood uses. Since net metering does not require the power company to pay us for any electricity we produce in excess of what we use, it does not make sense to overproduce, at least from a narrow economic perspective. As of late May, 2015, it looks like we’ll be right on target.

It’s a blast to check the metering system and see the power flowing to the grid on a sunny day. Since we live in a northerly climate, many folks around here don’t realize that solar power is more than viable, and as the price of electricity continues to climb, it seems more and more silly not to take advantage of it.

Lessons Learned

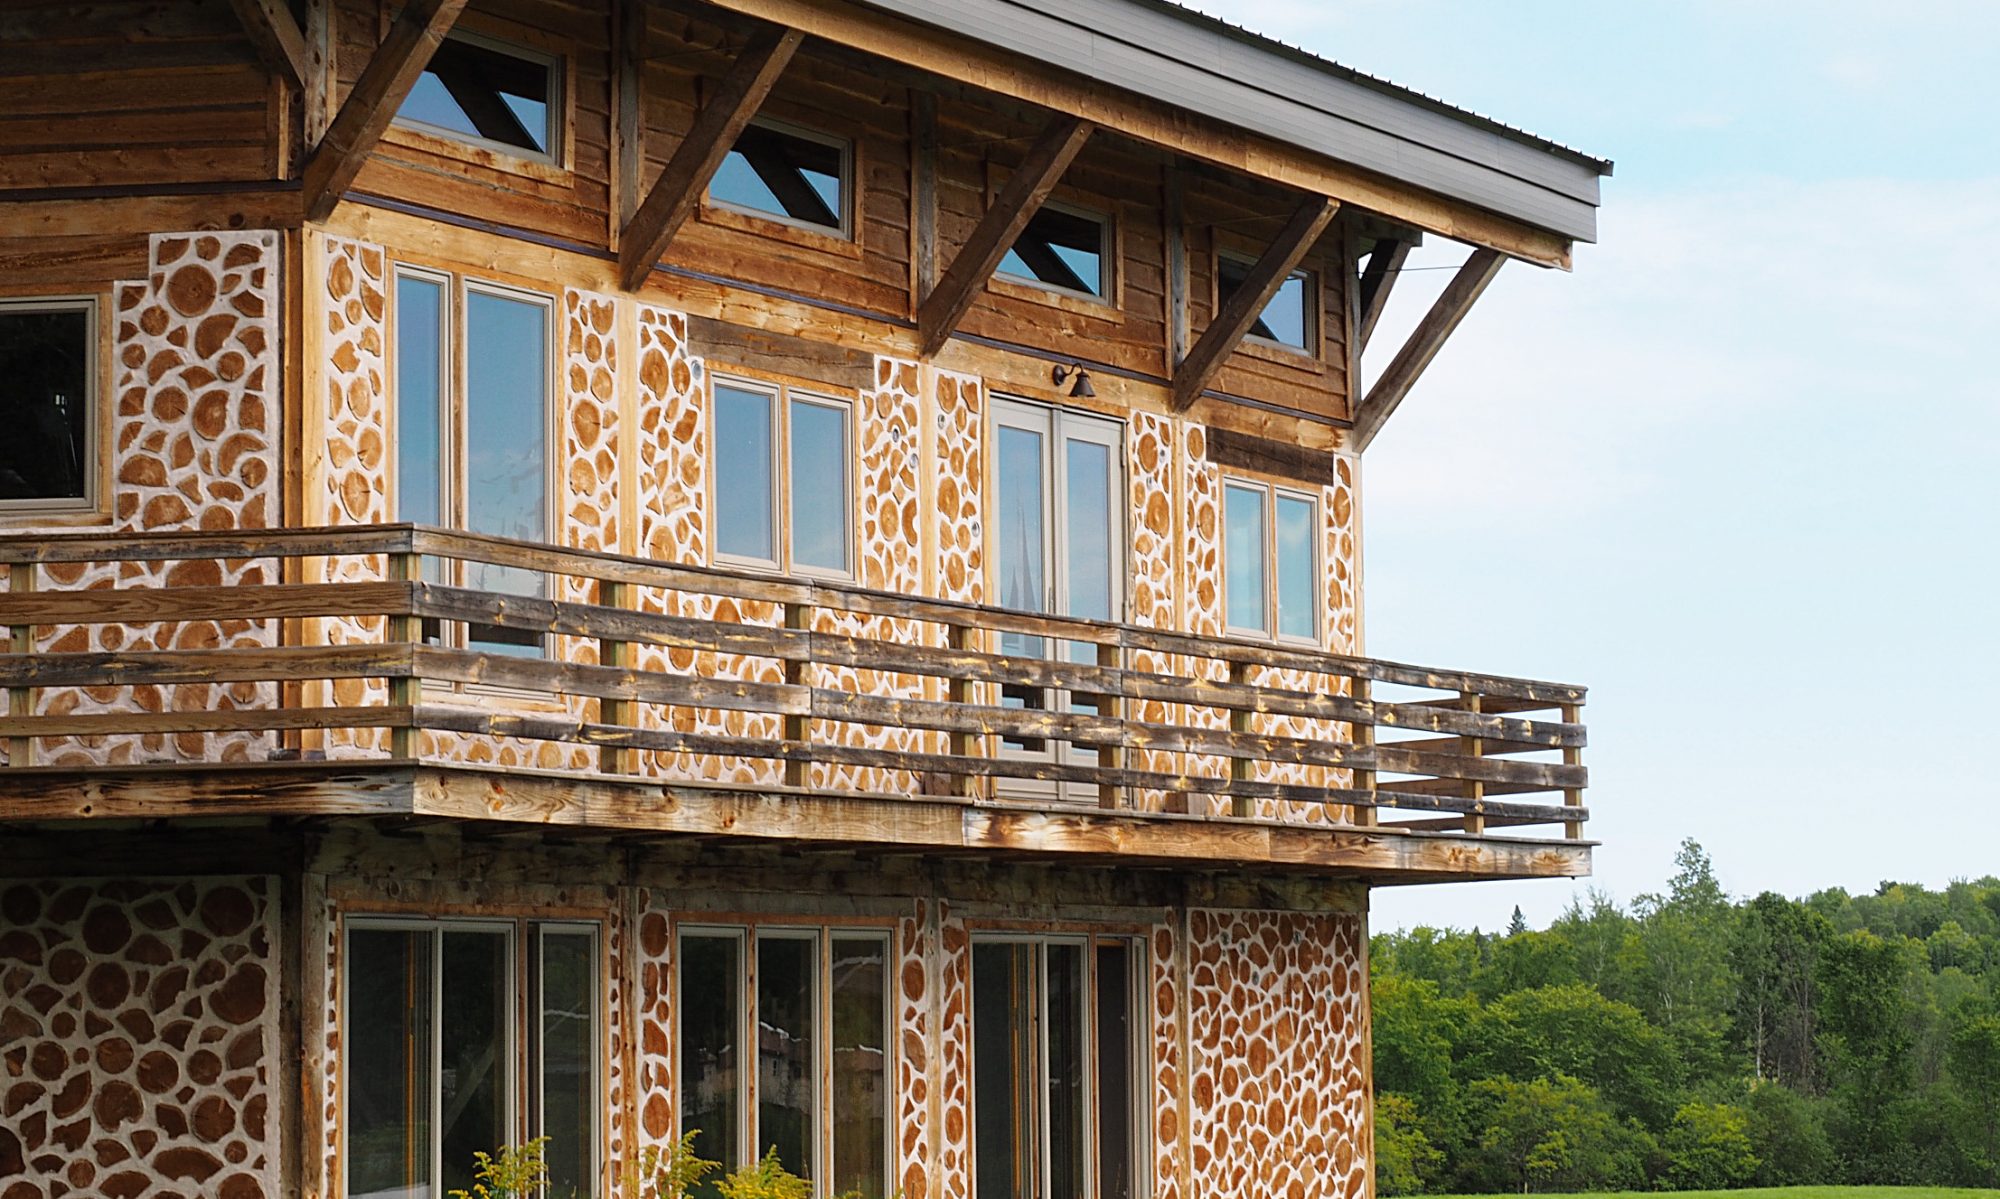
As work has progressed at Nerdwood, there have been times when something didn’t quite turn out right, or didn’t look or function as we expected. These missteps have resulted in having to do things over, which, considering how long this house is taking us to build, can be a bit deflating. I can’t really say I’m surprised this happens; it seems to happen to professionals as well, and we are anything but. Still, these lessons are a bit heartbreaking.

In this post, I’m going to share two instances requiring re-work that occurred this year, one a bit bigger than previous instances, and the other a whole lot bigger. Hopefully the lessons we learned will help others avoid the same mistakes.

Lesson I

The first mistake has been bugging me for nearly two years. When I put in the chimney, as noted in Wood Light/Wood Heat, I struggled with the proper way to flash the chimney. There was not a lot of information available about properly flashing a chimney coming out of a metal roof. Reluctant to cut into our lovely metal roof, I tried a silicone flashing boot designed for bolting on top of the existing roof, and I bolted a metal flashing cone on top of that for good measure.

Unfortunately, when spring came, so did the water, drip-drip-dripping from the ceiling box the chimney goes into. Not a torrent by any means, just a small drip every time there was a decent rain. Argh! Clearly, I would have to figure out a way to lap the metal roofing over the flashing, just like you would with a shingle roof.

With the many tasks last year, I just didn’t find the time to take care of the chimney issue. Finally, this past July, I got up on the roof to see what was going on. In the last post, I mentioned the crazy hard winter we, and much of the country, experienced this past year. When I got up top, I saw that the cricket (snow diverter) I had built was woefully inadequate:

Chirp no more, lil' cricket

It did it’s best, but clearly we need a much taller cricket to protect the full height of the chimney, and avoid this happening again:

No-Fun-House mirror

So, first things first, I had to stop the dripping; we could worry about putting up a new diverter later. First, we purchased another sheet of the same roofing we used originally. Good thing it’s still made! Then, I spent an afternoon with thin cardboard and a pair of scissors, figuring out how to cut and overlap everything so the water would decide to run down the roof instead of into the chimney box. You can’t fight water, but you can persuade it. Another day on the roof with the new sheet of roofing and a bucket o’ tools, and the job was done. Interesting to see how the color of the existing roof has changed over six years.

Sat in your lap

As I write this in October, there has been nary a drop in the house since July, so I believe this did the trick. I also noticed that when I removed the old roofing panel, much to my relief, the decking underneath was in good shape. Not enough water had gotten in to rot out any of the framing or decking. We still need to get that cricket installed before the snow flies.

Lesson II

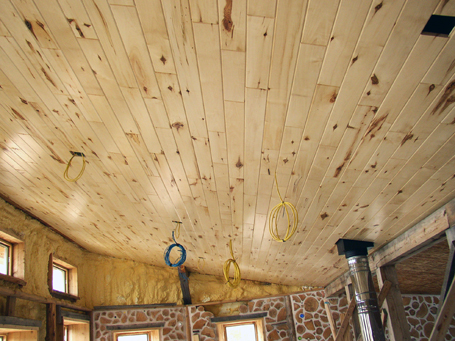
A week or so after fixing the chimney, we were heading out of town so I could have surgery done on my bum foot. On the way out, we stopped at Nerdwood to have a look at things. When I went inside, I admired our new ceiling, as I had done every time over the past few weeks. As you walk in, you see the living room ceiling first, and today it looked great as always. When I looked at the second-floor ceiling, nothing unusual registered at first. Then a feeling of… wrongness came over me.

I suddenly had a disorienting feeling of being in a dream. I realized I was looking at OSB sheeting on the ceiling, as I had been for the previous three years. As in a dream, I knew that the ceiling was done, but what I saw said that it wasn’t. I fought the cognitive dissonance as I ascended the ladder. Something terrible had happened.

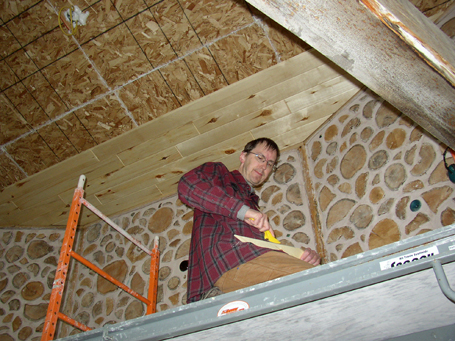
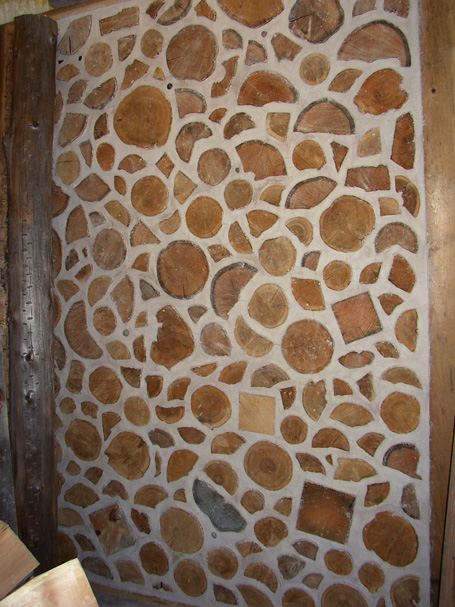
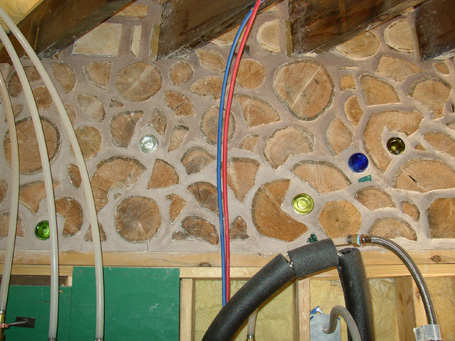
When we put up the ceiling, we used a brad nailer, shooting 18-ga. brads through the tongue of the paneling, into the OSB sheeting. Where there were roof rafters behind the OSB, I made sure to put a brad as well, so it would go through the OSB and into the rafter. The paneling was very tight against the OSB with this method, and it seemed like nothing could dislodge it. I was very wrong about that. The last course, at the apex of the ceiling in the front of the house, had come loose, and row by row, the paneling simply peeled off the OSB like a roll-top desk. About two-thirds of the way down the second-floor portion of the ceiling, several temporary braces had stopped the peeling of the ceiling, leaving one-third left and the rest of the paneling in a jumbled heap on the second floor.

The least it could have done was fall neatly...

Hang in there, Boardy!

That was weeks worth of work, undone in what probably took a few seconds. What’s even worse, we ordered the paneling pre-finished, and many of the fallen boards have unsightly gouges, dents and scrapes on them. They all have useless brads sticking out of them, which will have to be removed in order to re-use the good ones.

Pictures of Matchstick Men

Argh! I did not know that I should have secured the last, highest row by driving proper screws into the boards, through the OSB and into the roof rafters. I knew this coming winter we would be framing above the cordwood, and this framing would secure the top row of paneling into the ceiling, but I also knew the brads would surely hold until then. Well, you can quit calling me Shirley.

One thing that made this less bad than it could have been was that it was the second-floor ceiling that came down, rather than the living room ceiling. Although it’s bigger in area, it was much easier to put up due to the lower ceiling height and the lack of large beams in the way of the scaffolding.

We delayed our trip for an hour or so while I secured what was left of the second-floor ceiling using screws, then secured the top row of the living room ceiling using screws as well. I am not looking forward to de-nailing, sorting and re-installing those boards.

This guy was mightily amused by the drama:

Laugh it up, Red

Ceiling and Shiitake

As spring continues to be sprung, we continue work on the ceiling. By the end of April, we finished the larger of the two sections, the area over the second floor:

Knot bad!

At this point, things get a little trickier. The outer edges of the second floor ceiling will eventually have walls built up to them. You can see where those walls will go in the photo above, between the top of the cordwood walls and the ceiling. Because of this, we didn’t have to worry about keeping a straight edge when we got to the end of a row of paneling; the edges will be covered so we could leave it a bit ragged.

The ceiling in the living room not only has to butt up against the top of the existing cordwood wall, but there are a whole bunch of crazy angles where it does so.

Revenge of the twelve-sided house!

In addition, it’s much higher above the first floor than the section we just finished was above the second floor. This makes for some slow going.

In the meantime, the snow slowly melts from our over-eager winter (340″ of snow at the Big Snow Thermometer, a bit less at Nerdwood). Large bergs of snow calve from the glacier on the roof:

Snowhenge!

By May, we’ve made pretty good progress on the living room ceiling:

Wood on wood on wood!

No snow on the ground means it’s also time to work on the garden. This year, we are inoculating shiitake mushroom logs. The spawn comes in little plugs:

Not all spawn is alien in origin

Lightly coppicing a single cluster of maple trees yielded plenty of logs to drill.

It may not get us into "Fine Mushroom Log" magazine

Holes drilled and plugs inserted, all we do now is keep them moist in the woods all summer. Then next spring, lotsa tasty ‘shrooms for the next three or four years.

Champagne dreams and mushroom wishes

Finally, in mid-July, we nailed in the last ceiling board.

Aspen a long time coming


Chiefly Concerning the Ceiling

Some time during the longest February in all of recorded human history, a month in which each weekend was punctuated with an apocalyptic blizzard that made driving out to work on the house a foolhardy proposition, we received a shipment of 1000 square feet of tongue and groove aspen paneling from Keweenaw Specialty Woods. Aspen isn’t considered the most desirable type of tree to harvest around here, but we think it looks pretty good.

Stacks and stacks ...

... and stack and stacks.

It very soon became apparent that this lovely stuff was not going to levitate 20 feet in the air and attach itself to the ceiling, so we had no choice but to get to work. We began on the second floor. First came a painstaking process of measuring and marking on the floor, then transferring the marks to the ceiling with the use of a laser level.

Marking time.

Once that was complete, any remaining gaps in the ceiling insulation were filled in with spray foam. We were then ready to lay up the first course of paneling.

Watch yer fingers.

The planks are nailed into the OSB  with a battery-powered finish nailer, a product with the rather alarming and belligerent moniker “Airstrike.” It’s extremely convenient to work with, compared to the type of nail gun powered by a hose attached to a noisy air compressor. After carefully putting up the first course as straight as possible, it was just a matter of pounding each consecutive row into place with a big rubber mallet (affectionately referred to as the BRM) and nailing it up.

BRM in action.

Good weather for an airstrike.

There are a few details in the ceiling, such as the chimney, which require some individual shaping of the paneling with a hand saw.

A little off the top ...

I know some of you like to see all these details.

Greg filled in the seams in the OSB with spackle to create a vapor barrier between the insulation in the roof and the warm air inside the house.

All that stands between us and condensation.

The aspen planks are in a variety of  lengths, so we are creating a pattern of randomly alternating length, not unlike the “random rubble style” of the log ends in the cordwood walls. Before too long, it’s looking pretty sharp.

Goodbye ugly OSB ...

... hello beautiful aspen panelling.


50 Words for Snow

After a few mild winters here in the Copper Country, the snow is back and it’s not kidding around this time. It started snowing in earnest a few days before Thanksgiving and barely let up for over a month. Fortunately, the tractor has a snow blower attachment, making it a lot easier to get to the house even with 3+ feet of snow on the ground. If only I had gotten around to removing the mower deck and putting the blower on before it got cold!

Just follow the white path home

Fortunately we made a bunch of lime putty and dried a mini-beach worth of sand before the snow started, so once the Fall outdoor chores (including cutting up still more logs!) were no longer possible, we picked up cordwooding again. We’re now completely into the second floor loft; this wall on the west side of the house is partly over the open area and partly in the loft:

Four-string wall panel tuned to 'E'

It was a bit tricky getting to the top, but with some scaffolding and homebrew planking, we were able to finish it up.

Call of the West, or Wall of Voodoo

Over on the east side, Clare finished up her head-of-the-stairs bottle feature. This was in progress in the post My Autumn’s Done Come

Some folk call it "Drinky Pete"

We’ve used up the lime putty and sand, just in time for the tongue-and-groove aspen for the ceiling to be delivered. Looks like I’d better fire up the snow blower to clear a path for it!

In Which We Drop Some Cordwood Science

Our cordwood construction workshop on September 21 was quite a success. Matt’s promotional skills drew in seven intrepid participants who made the journey out to Nerdwood to try their hands at mortaring up a few logs. They were a great group of people; all already had done a fair amount of research on cordwood and all had very interesting and varied backgrounds. They asked a lot of intelligent questions and worked hard. I hope they had half as much fun participating as we had hosting.

We started out with Matt giving an introduction, and on to Greg giving a talk about the house and our progress so far.

Greg and his invisible hoagie.

And then on to a tour of the interior of the house and some discussion of the masonry heater and some of the other features.

Matt's invisible cupcake.

Greg gave a spiel about lime putty mortar and demonstrated mixing up a batch in the mixer.

Sand + lime putty = progress.

We were then all set for the main event: building some cordwood walls. Off to the garden shed. I gave a brief demonstration of getting a wall started, and everyone quickly got down to business.

The front of the shed.

Rockin' that front panel.

The back of the shed.

Matt likes what he sees.

As you can see, these folks were naturals. By the end of the session, we had three panels halfway done. I did a little pointing demo and we wrapped up the workshop. Greg and I are looking forward to seeing some of the new cordwood projects our workshoppers are planning!

This visitor to the workshop had to be sent on his way back to the woods. Someone identified him as a Copper-bellied Snake (Nerodia erythrogaster neglecta), but after a bit of research it turns out that he was in fact a Red-bellied Snake (Storeria occipitomaculata occipitomaculata).

Sorry to disturb you, Storeria occipitomaculata occipitomaculata.

My Autumn’s Done Come

Roundy bales

Ah, September in beautiful downtown Tapiola. The hay has been baled up, the vegetable garden harvest is in full swing, berry-picking season is winding down, apple picking is in the offing, and talk has begun to turn to the topic of shooting things. The weather is cool, the bugs dying off, and it’s an ideal time for a cordwood construction workshop.

The workshop is scheduled for Saturday, September 21. If participating in a hands on cordwood construction workshop sounds like something you would like to do, head right over to our good friend Matt Manders’ spiffy new website, superiorskills.net for information on how to sign up. Matt is putting it all together, Greg will be doing most of the instruction, and I will be on hand to heckle them and maybe help out. We’ll be working on the garden shed, and we hope to cover mortar mixing, wall construction, pointing, bottle ends, and cordwood best practices. If you can’t make it to this workshop, it looks like Matt has a bunch of other cool stuff coming up, so definitely check out his site if you are in or plan to be in the area this fall.

So what has been going on at Nerdwood? I realize it has been a painfully long time since I last posted.  Much of what goes on is, frankly repetitious, but I will try to cover some of the salient points on future posts. We’re making good progress on the second floor interior walls.

Second floor madness.

Most of the living room is finished, and we are working our way into the second floor loft.

Second floor wall in progress.

Bottle feature at the top of the stairs.

We hope to finish the interior walls this fall, and we’re enjoying the excellent weather while it lasts.

That right there is a big zinnia.

Wood Light/Wood Heat

Fire, I'll take you to burn. Fire, I'll take you to learn.

So here we are, Fall 2012, and although we’ve had the masonry heater in since December 2010, we haven’t been able to fire it up – no chimney! I was determined that this fall we would be able to set fires inside the house (and not have to call the Otter Lake Volunteer Fire Department).

Eric from Solid Rock Masonry had built up a brick chimney to just below the second floor. We thought it would look kind of neat (and be easiest) to switch to metal chimney from the top of the brick chimney all the way through the ceiling and the roof. The first step was a transition plate from masonry to Class A chimney pipe:

Silver Tube Dance Party

Class A chimney is double-walled with an insulating blanket between the walls. It’s safer and requires less distance from flammable materials than single-wall stove pipe. Another reason we went with metal pipe is that the chimney goes through the floor joists holding up the second floor, then through the roof rafters, and these two things are not quite lined up at Nerdwood (it’s rustic, OK?). Thus, we had to put a bit of an offset in the chimney to move it over about four inches.

By hook or by crook, we will.

Here’s how the inside looks. Just ignore the cross-braces that we’re leaving in until we put up the railing.

Smokestack Lightning

So far, so good. Now, Clare’s favorite part, “Greg monkeys around on the roof.” It was kind of sickening to cut a big hole in our nice metal roof, but it beats having the house fill with smoke.

Making a hole where the rain gets in...

This part was a little bit nerve-wracking, since it was late November and at any time it could start snowing and not stop for a month or two. I worked as fast as I could, adding the rest of the chimney sections, then using a form-fitting rubber boot as  the first level of flashing.

The morning sun is shining like a red rubber boot

After caulking and screwing this down, and letting the caulk cure, I added a second flashing, this one metal. Notice the minor amount of snow that fell in the intervening few days:

Flash & the Pan

Finally, to protect the chimney from a freight train of snow sliding down the metal roof, I used some extra roofing, plywood, lumber and rubber flashing to build a “cricket” to divert the snow:

Chimney, not Jiminy...

A day or two after this, it did in fact snow quite a bit. But, as you can see from the first picture, we were too busy enjoying our first Nerdwood fire to worry about that.

2012 Cordwood Year-end Wrap-up Extravaganza

I truly did not mind drinking a little Cointreau.

So there we were, merrily whiling away the summer stacking logs and mortar, carefully aligning bottle ends, and neatly pointing the mortar. Slowly, week after week the walls went up. There was so much to do—mix putty, split and clean logs, look after the garden, mow the grass—but I couldn’t escape this nagging sensation in the back of my mind that I was forgetting something important.

It was not until over six months had passed that it dawned upon me that I was supposed to have been blogging about all this the entire time! Once again it is January, and I am woefully behind on posts. Enough with the chit-chat, let’s review our progress.

The better part of the summer and fall was devoted to finishing up the first floor. This included a  panel surrounding the front door:

Front door half finished.

Front door, done!

A panel at the very back of the house:

Window panel.

A panel surrounding the french doors:

Back door panel.

Two very large panels (“devil walls”) in the northeast corner:

That ol' devil wall ...

The other big wall.

And a small panel in the utility room:

Utility room panelette.

Whew, that was a lot of panels. A crucial part of the process was to have several going at once, at various heights, to minimize the discomfort of having to work in the same position all day whenever possible.

By September, we were all done with the first floor. Time to cultivate a second floor mentality.