Time to wrap up the final framing details.

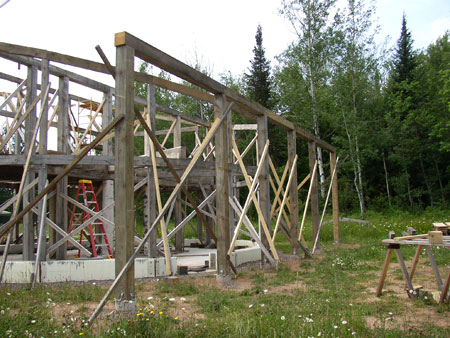
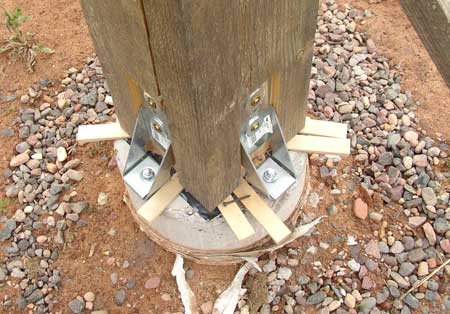
The picture above is of the rear roof supports. The house is sort of semicircular and the roof is a big sloping square, so this line of posts and beams catch the bottom of the roof. The corners are large areas of overhang, suitable for firewood storage, rainwater catchment tanks, and a screened porch (eventually). As it turned out, the brackets we used to tie the posts to the concrete piers we had poured were a bit larger that I had envisioned, so we had to rout out mortises on all four sides of each post bottom to get the brackets to bite into solid concrete:

Some of the concrete piers weren’t exactly level, either, so a number of hardwood shims were in order, as you can see. At some point we’ll cover the brackets somehow in order to prettify the base. These posts and beams are eight-by-eight; overkill from an engineering standpoint, but just right aesthetically.
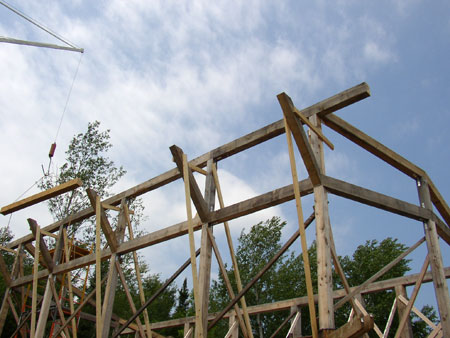
Once done with this, the next (final) phase of the framing was to provide support for the front roof overhang. In the front of the house, the roof sticks out about four feet, so angly bits and beams were in order.

Since these were twenty feet above ground and sticking out over three feet from the house, you can bet I was wearing a fall-protection harness clipped to the frame!
So now the frame is done. Hurray! We celebrated with a glass of ice wine from Canada. The frame ended up taking six months of working nights and weekends, as well as a week or two of vacation and holidays. Longer than I expected, but if we hadn’t had a fifteen-inch circular saw to make the cuts, we’d still be on the first floor! Next up, the roof. But first, summer flowers abound, both planted:

and wild:

